Is Photoshop really that hard to use ?
I am not going to lie : you can do very complex things with Photoshop. There are so many options and tools, that sometimes it can be overwhelming. There are many tutorials out there but some of you might still feel lost. The aim of this article is to give you some tips on how to edit your pictures with simple tricks. In just 15 minutes, you can make a blah picture look professional and much more nicer.
Tip 1 : beauty retouching
You look beautiful no matter what, with or without makeup, but maybe there are some details (dark circles, pimples..) that you would prefer to erase. You don’t have to be ashamed if you want to edit those details
How to erase bags under your eyes without looking like your face is made from plastic
My tip is to never erase them completely. Your face has a shape, and very often your under eye area is a bit more hollow than your cheeks. So it is NORMAL to have a small shadow in that place. What we want to erase is any weird shadow that would have been created by a bad lightning, or blueish marks that your concealer couldn’t conceal.
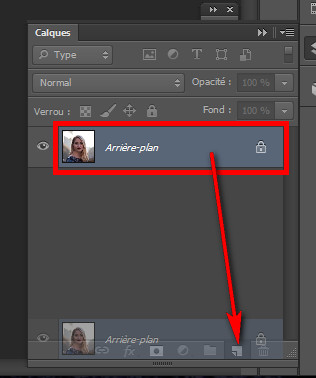
- Duplicate your main layer by dragging it to the copy icon
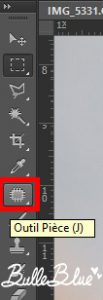
- Choose the PATCH TOOL in Photoshop
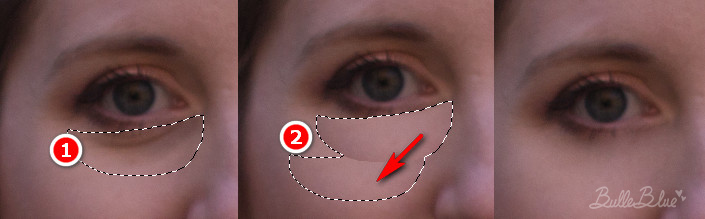
- Select the area
- Drag the area you want to modify towards an area that is light/smooth
- Voila !
- Change the opacity of the layer (around 50%) to create a more natural look. Then you can merge your layers with CTRL + E (if you want to keep your original layer, make sure to create another copy first)

This method works also for shadows around your nose, mouth, chin etc …
Spots, scars and others
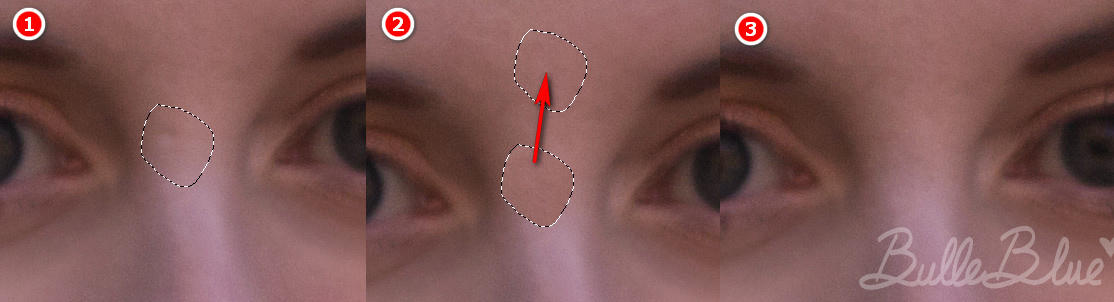
If you have a spot, a scar or a mole that you want to remove, it is actually very easy ! We are using the same technic, but this time we will leave the second layer with a full opacity at 100%
- Select the PATCH TOOL

- Select the area
- Drag the patch to a smooth area
- And voilà !
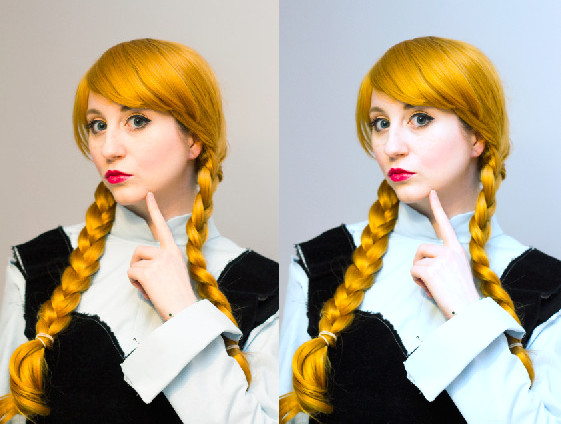
Before / after

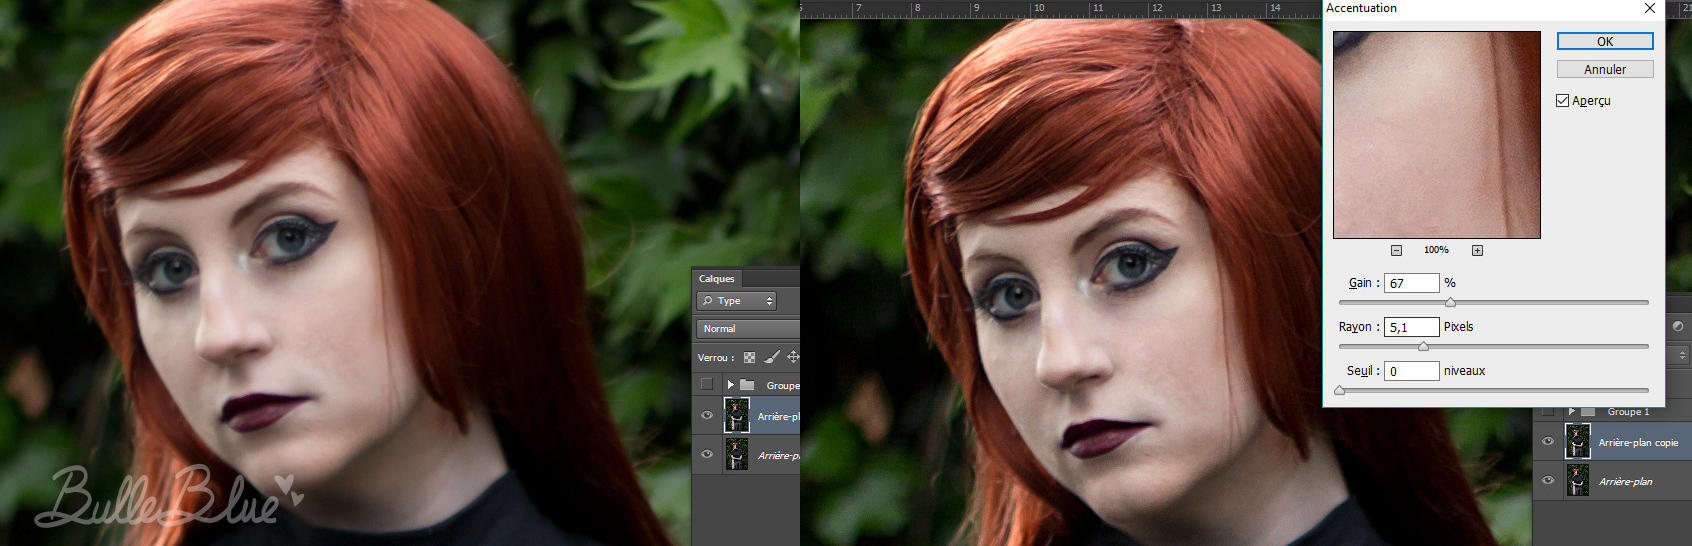
Tip 2 : make your eyes sharper
Very often, the camera doesn’t focus on the eye but rather on the tip of your nose, or your bangs. It’s very annoying and it makes the whole picture look kinda blurry. And it’s even more annoying when it is THE picture where you make the perfect pose.
If the picture isn’t too blurry, you can fix it by making your eyes look sharper.
- Create a copy of your main layer
- Apply sharpening filters on your new layer
- Filter > SHARPEN > SHARPEN
- Adjust the filter so your photo look good but not too sharp either
- Do another one : Filter > SHARPEN > SMART SHARPEN
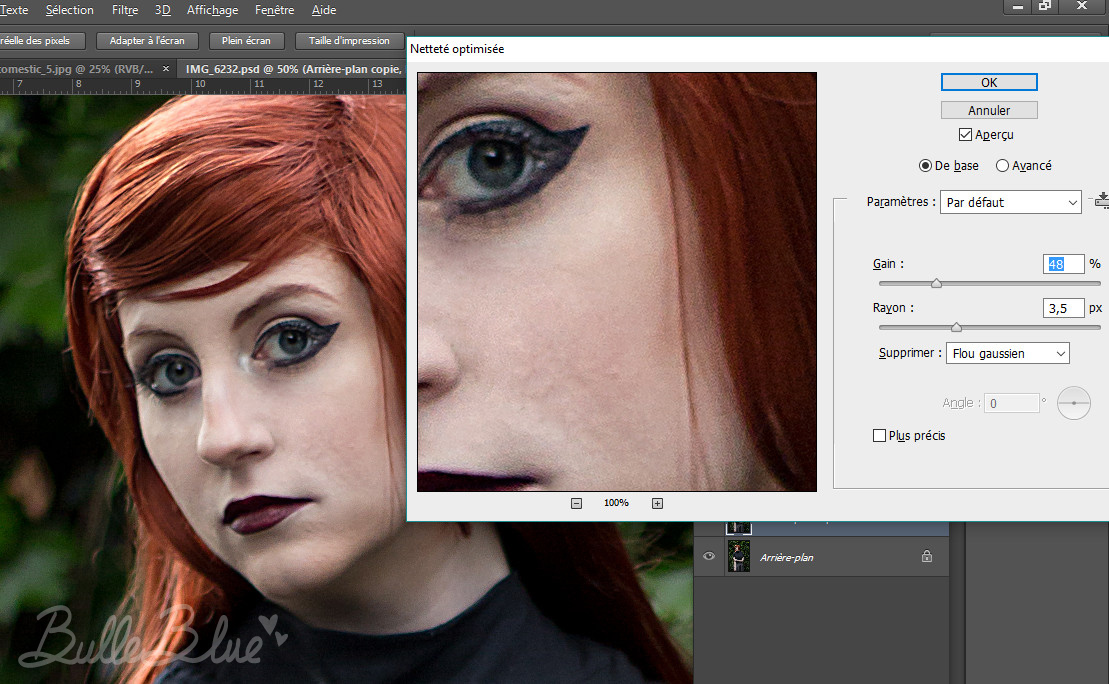
- Adjust the filter so your photo look good but not too sharp either
Now, we don’t want the picture to be sharp everywhere.
- Select the layer you have been working on
- Go in the menu Layers > New LAYER MASK > HIDE ALL
- Your layer will “disapear” and a black layer mask will appear next to your picture thumbnail in the list of layers (see screenshot). Make sure you click on the layer mask to select it.
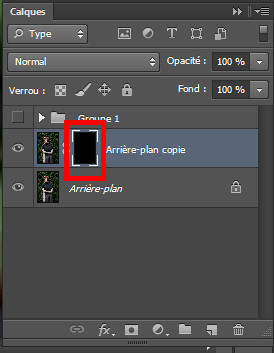
- Select the brush and white paint
- And paint where you want your “sharp” layer to appear again : on the eyes (make sure you are on the layer mask, and not your picture. If you see white paint on your picture, you haven’t selected the black layer mask). You can see white little bits appear on the layer mask.
- If you make a mistake, you can just use black paint to make the layer dispapear again

- CTRL + E to merge your layers : you know have one layer
- Copy your main layer again
- We will use Color Burn and Color Dodge to make the eyes more shiny

- Select the tool COLOR DODGE and set it for LIGHT TONES and EXPOSURE around 25%
- Use the tool to lighten the eye iris. Don’t do it too much or it will look weird. You can also use it on the white reflection inside your pupil

- Use the COLOR BURN tool to darken your pupil and your make up/lashes

Tip 3 : make sure your composition is showing your cosplay to advantage
On a picture, you can have a great pose / expression, but if the composition isn’t good, it can spoils everything.
I’m not saying that you should follow strict rules, sometimes a little bit of fantasy can be good, but when you look at your picture, ask yourself if it looks professional. You can look at ads or other photographer works to see how they usually frame their picture.
There are tons on information about composition on internet, it can give you some inspiration for your own pictures ! (for example here)
Tip 4 : fix the light
Finding the right lightning is very hard. If you took your picture inside and doesn’t have professional lightning, your picture might be all yellowy and dark. If you took your picture outside, it might be too bright. There are easy way to fix those problems and they will make your picture look so much better!
Correct the white balance
When you correct the white balance, you want white stuff to look… white. Pictures taken with artificial lights inside will often look yellow. If this is what happened to you, don’t worry, you can correct this easily.
- Create a blue layer with the blend mode “overlay” with an opacity between 10 and 20%


- You can also play with a color balance layer (layer > adjustement layer > color balance) and adding more cyan and blue in the highlights tones balance

Correct the darkness/brightness
- You can adjust the darkness or brightness of your pictures with the level adjustement layer (layer > adjustement layer > levels) in photoshop. It’s a simple trick but most of the time, adding more light will make you picture look SO MUCH better.

Tip 5 : play a little bit with the colors
Cosplay is all about making people dream and making them believe you are the character you embody. So when you take pictures, you might want them to look a little bit more … dramatic.

- You can use the color balance layer (layer > adjustement layer > color balance) to enhance some colors in the highlights or the dark tones.
- You can use the selective color layer (layer > adjustement layer > selective color) to modify a specific range of tones : reds, yellows, greens..
There are so many things to do with colors that this might require its own article. You should play with the adjustement layers until you find something you like!
And don’t forget to have fun!